Usage
You should now see the Beta Protection extension in your Chrome extensions window.
If you don't see the extension icon (look for the pink lock icon) in your browser toolbar, click the Extensions button (the puzzle piece) in your Chrome toolbar, find Beta Protection in the list and click the small pin icon beside it. This will pin Beta Protection to your toolbar so its always visible.
Click the icon in the toolbar to open the popup and check on your extension. At the top of the screen will be the connection status. If this shows Connected you're connected to the backend and can skip the next step!
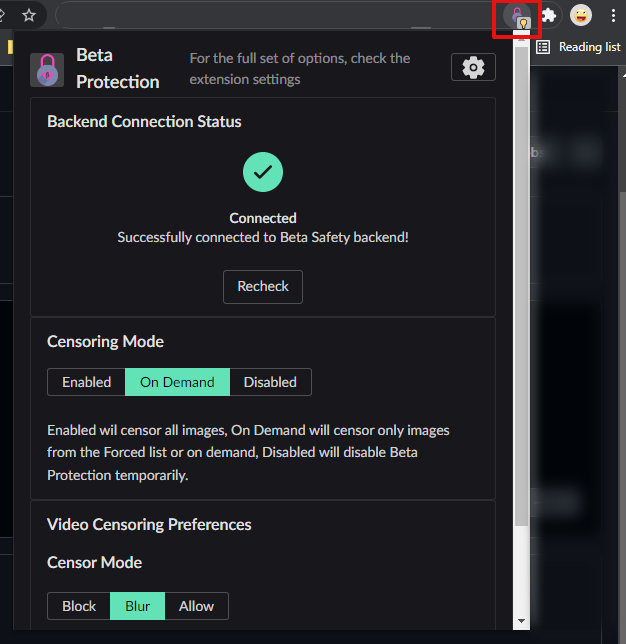
From here, you can change the most common settings like the censoring mode and video censoring mode. If you want to customize Beta Protection though, click the Settings icon in the top right of the popup to open the full options page.
Backend Configuration
Beta Protection (since v0.1.0) has defaulted to using a locally running Beta Censoring server for censoring. If you're running your backend somewhere other than your local PC, or are using a different backend (like Beta Safety), you'll need to quickly set that up.
From the extension popup, open the settings using the cog in the top right. Drop down the Backend Host section, and enter the address where your backend is running into the text box. This will usually be something like http://localhost:2382 (for Beta Censoring) or ws://localhost:8090/ws (for Beta Safety).
Make sure the right backend is selected below the address and click Save and Reconnect. Click Recheck in the Connection Status at the top of the page to check that Beta Protection can communicate with your backend.
You can change your backend whenever you like! Just change the address (and make sure the right backend type is selected) in the settings, click Save and Reconnect and you're good to go.
You can also right-click on the icon in the toolbar and click Options to directly open the options page. From the options page, you can directly customize basically any part of the extension. Generally, the options page will explain what each option does so make sure to read the tips as you change things.
Placeholders
When you first install the extension, there will not be any placeholders, so images will be replaced by a simple loading icon while they are being censored. It's generally more fun to have placeholder images appear while censoring is running, so we recommend importing some placeholders to get started.
Manage your Placeholders
From the Beta Protection options page, open the Placeholder Management section and click Open Placeholder Store to open Beta Protection's dedicated placeholder manager. From here you can add, preview and remove placeholders for the extension to use.
To add new placeholders, click the plus (+) icon in the top right and you can use the Import Folder... or Import Single File... buttons to import placeholder images directly.
Beta Safety
The easiest option for Beta Safety users is to import the placeholders from Beta Safety. From the Beta Protection options page, open the Placeholder Store section, click Import from Beta Safety... and choose the placeholders folder from your Beta Safety folder (usually in browser-extension/images) and Beta Protection will import all the placeholders from that folder.
Make sure you enable any newly added placeholder categories in the Placeholders and Stickers section in the options after you import new placeholders.
It's worth noting (regardless of where they're imported from) that placeholders will be completely reset if you remove Beta Protection since Chrome will remove all your extension data. This is expected (and a good thing to be honest).
Context Menus
On any page, you can right-click to get a few extra options to control the extension.
- Enable censoring this tab will force-enable censoring for the current tab, regardless of whether it otherwise would be.
- Recheck images on this page will re-run censoring on a censored page, mostly useful if a page still has placeholders left that seem to have failed.
Advanced
Local Censoring
Since v0.1.0, Beta Protection has included the ability to load your own local saved image from your PC to be censored. This provides a reasonably easy to use method of censoring a batch of images from your PC regardless of your choice of censoring backend. Note that local censoring is still an experimental feature so there might still be some bugs we haven't found yet. To get started with it, click the Censoring button in the top right of the popup or options page and follow the steps in the wizard.
Subliminals
Beta Protection has recreated the "subliminal messaging" feature from Beta Safety, but leaves it disabled by default. You can turn it on again in the Danger Zone section of the Options page, but be warned that it can be quite intrusive and does cause noticeable flashing on the screen.
You can also load in your own custom messages to display in place of the default ones. Click the Import custom messages... button to load in a custom message file. The file should be a simple text file with one message per line. Once imported, the subliminal feature will draw from your new custom message list.
Import and Export
You can also import and export your settings from the controls at the bottom of the Options page. Once you're happy with your setup, we'd recommend exporting to a file and keeping it somewhere handy in case you want to set Beta Protection up again. The export file will only include preferences, not your backend configuration or imported placeholders.
You might also be interested in the Overrides feature, if you want a more advanced method of enforcing censoring settings, for yourself or other users. Check the guide on overrides here for more information.